介绍
基本思路非常简单:
- 显示相机预览
- 添加矩形视图到相机预览(新裁剪图像的边界)
- 裁剪图像并将结果保存到文件中
使用代码
开始吧!在Android studio中创建一个新项目(我使用的是3.2.1版),或者您可以下载源文件并选择:File-New-Import项目。添加到build.gradle应用程序级别:
implementation 'com.jakewharton:butterknife:8.8.1'
annotationProcessor 'com.jakewharton:butterknife-compiler:8.8.1'
我使用Butterknife库,它非常有用。此外,我们需要相机和写入权限,因此将其添加到AndroidManifest.xml。
<uses-permission android:name="android.permission.WRITE_EXTERNAL_STORAGE" />
<uses-feature android:name="android.hardware.camera" />
<uses-permission android:name="android.permission.CAMERA" />
我们需要2个片段,一个用于相机预览,另一个用于显示裁剪图像。创建新片段- ImageFragment(文件-新建片段的片段(空白)-add TextView和Imageview对布局的XML文件:
<?xml version="1.0" encoding="utf-8"?>
<FrameLayout xmlns:android="http://schemas.android.com/apk/res/android"

    xmlns:tools="http://schemas.android.com/tools"

    android:layout_width="match_parent"

    android:layout_height="match_parent"

    tools:context=".ImageFragment">

    <LinearLayout

        android:layout_width="wrap_content"

        android:layout_height="wrap_content"

        android:orientation="vertical">

        <TextView

            android:id="@+id/res_photo_size"

            android:layout_width="wrap_content"

            android:layout_height="wrap_content" />

        <ImageView

            android:id="@+id/res_photo"

            android:layout_width="wrap_content"

            android:layout_height="wrap_content"

            android:src="@drawable/ic_launcher_background" />

    </LinearLayout>
</FrameLayout>
将一些代码添加到ImageFragment类中,它只显示image和textview信息:
public class ImageFragment extends Fragment {
private Bitmap bitmap;
@BindView(R.id.res_photo)
ImageView resPhoto;
@BindView(R.id.res_photo_size)
TextView resPhotoSize;
public void imageSetupFragment(Bitmap bitmap) {
if (bitmap != null) {
this.bitmap = bitmap;
}
}
@Override
public void onCreate(@Nullable Bundle savedInstanceState) {
super.onCreate(savedInstanceState);
this.setRetainInstance(true);
}
@Override
public View onCreateView(LayoutInflater inflater, ViewGroup container,
Bundle savedInstanceState) {
View view = inflater.inflate(R.layout.fragment_image, container, false);
ButterKnife.bind(this, view);
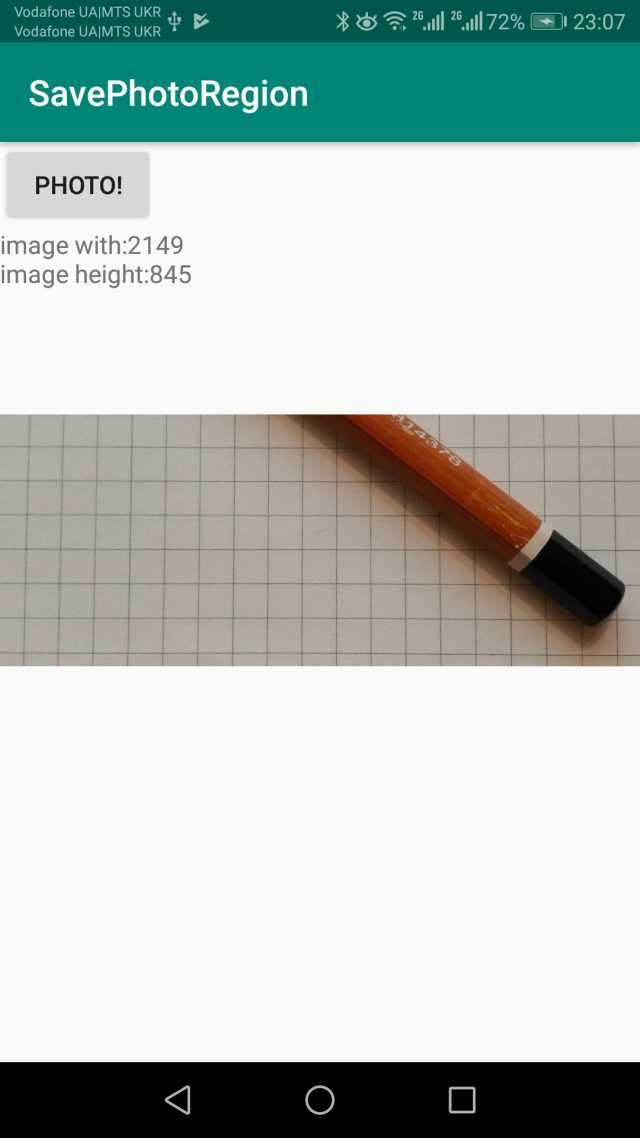
//check if bitmap exist, set to ImageView
if (bitmap != null) {
resPhoto.setImageBitmap(bitmap);
String info = "image with:" + bitmap.getWidth() + "\n" +
"image height:" + bitmap.getHeight();
resPhotoSize.setText(info);
}
return view;
}
}
创建第二个片段 - PhotoFragment(File-New- Fragment- Fragment(空白) - 向layout-xml文件添加一些组件。主要是SurfaceView(用于摄像机预览)和View(用于裁剪的边框)。
<?xml version="1.0" encoding="utf-8"?>
<FrameLayout xmlns:android="http://schemas.android.com/apk/res/android"

    android:id="@+id/frame_surface_main"

    android:layout_width="match_parent"

    android:layout_height="match_parent">

    <LinearLayout

        android:id="@+id/preview_layout"

        android:layout_width="match_parent"

        android:layout_height="match_parent"

        android:orientation="vertical">

        <RelativeLayout

            android:layout_width="match_parent"

            android:layout_height="match_parent">

            <SurfaceView

                android:id="@+id/camera_preview_surface"

                android:layout_width="match_parent"

                android:layout_height="match_parent"

                android:layout_centerInParent="true" />

            <View

                android:id="@+id/border_camera"

                android:layout_width="match_parent"

                android:layout_height="100dp"

                android:layout_centerInParent="true"

                android:layout_marginStart="50dp"

                android:layout_marginEnd="50dp"

                android:background="@drawable/border" />
            <!---Customize your views and button-->
            <TextView

                android:id="@+id/res_border_size"

                android:layout_width="wrap_content"

                android:layout_height="wrap_content"

                android:layout_alignParentStart="true"

                android:layout_alignParentBottom="true"

                android:text="size"

                android:textColor="@color/colorAccent" />

            <Button

                android:id="@+id/make_photo_button"

                android:layout_width="wrap_content"

                android:layout_height="wrap_content"

                android:layout_alignParentEnd="true"

                android:layout_alignParentBottom="true"

                android:background="@drawable/photo_button"

                android:text="photo" />
        </RelativeLayout>
    </LinearLayout>
</FrameLayout>
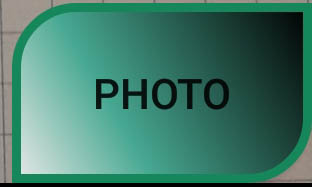
我使用了一个自定义按钮(绿色按钮),这是简单的代码,但很棒的视图!为此,您需要在Res-drawable中创建一个新的XML文件,如photo_button.xml,根据需要设置形状,颜色或使用一些Web资源,如下所示:http://angrytools.com/android/button /。
<?xml version="1.0" encoding="utf-8"?>
<shape xmlns:android="http://schemas.android.com/apk/res/android"

    android:shape="rectangle">
    <corners

        android:bottomLeftRadius="0dp"

        android:bottomRightRadius="20dp"

        android:topLeftRadius="20dp"

        android:topRightRadius="0dp" />
    <gradient

        android:angle="45"

        android:centerColor="#47A891"

        android:centerX="35%"

        android:endColor="#000000"

        android:startColor="#E8E8E8"

        android:type="linear" />
    <size

        android:width="100dp"

        android:height="60dp" />
    <stroke

        android:width="3dp"

        android:color="#16875A" />
</shape>
然后将背景按钮设置为:
android:background="@drawable/photo_button"
此外,我们需要裁剪边框 - 它将是一个简单的矩形,为此,您需要在Res-drawable中创建一个新的XML文件,如border.xml:
<?xml version="1.0" encoding="utf-8"?>
<shape xmlns:android="http://schemas.android.com/apk/res/android">
    <stroke android:width="2dp" android:color="#C4CDD5"  />
    <corners android:radius="10dp" />
    <padding android:left="2dp" android:top="2dp"

    android:right="2dp" android:bottom="2dp" />
</shape>
并设置view-background为:
android:background="@drawable/border" />
下一步,PhotoFragment上课。我们不能使用标准意图来制作照片,我们需要自定义函数,所以我们可以使用Camera类 - 它已被弃用,但仍然很好用,所以让我们使用它。该Camera级用来设置图像捕获设置,启动/停止预览,抓拍图片,并检索编码的视频帧。此类是Camera服务的客户端,它管理实际的相机硬件。
要控制预览,我们需要使用SurfaceHolder.Callback。这abstract interface是为了保持显示表面。允许您控制曲面大小和格式,编辑曲面中的像素以及监视曲面的更改。
public class PhotoFragment extends Fragment implements SurfaceHolder.Callback
{}
并实现一些方法:
@Override
public void surfaceCreated(SurfaceHolder holder) {

}

@Override
public void surfaceChanged(SurfaceHolder holder, int format, int width, int height) {

}

@Override
public void surfaceDestroyed(SurfaceHolder holder) {

}
像这样:
@Override
public void surfaceCreated(SurfaceHolder holder) {
camera = Camera.open();
}
@Override
public void surfaceChanged(SurfaceHolder holder, int format, int width, int height) {
if (previewing) {
camera.stopPreview();
previewing = false;
}
if (camera != null) {
try {
Camera.Parameters parameters = camera.getParameters();
//get preview sizes
List<Camera.Size> previewSizes = parameters.getSupportedPreviewSizes();
//find optimal - it very important
previewSizeOptimal = getOptimalPreviewSize(previewSizes, parameters.getPictureSize().width,
parameters.getPictureSize().height);
//set parameters
if (previewSizeOptimal != null) {
parameters.setPreviewSize(previewSizeOptimal.width, previewSizeOptimal.height);
}
if (camera.getParameters().getFocusMode().contains(Camera.Parameters.FOCUS_MODE_AUTO)) {
parameters.setFocusMode(Camera.Parameters.FOCUS_MODE_CONTINUOUS_PICTURE);
}
if (camera.getParameters().getFlashMode().contains(Camera.Parameters.FLASH_MODE_AUTO)) {
parameters.setFlashMode(Camera.Parameters.FLASH_MODE_AUTO);
}
camera.setParameters(parameters);
//rotate screen, because camera sensor usually in landscape mode
Display display = ((WindowManager) context.getSystemService
(Context.WINDOW_SERVICE)).getDefaultDisplay();
if (display.getRotation() == Surface.ROTATION_0) {
camera.setDisplayOrientation(90);
} else if (display.getRotation() == Surface.ROTATION_270) {
camera.setDisplayOrientation(180);
}
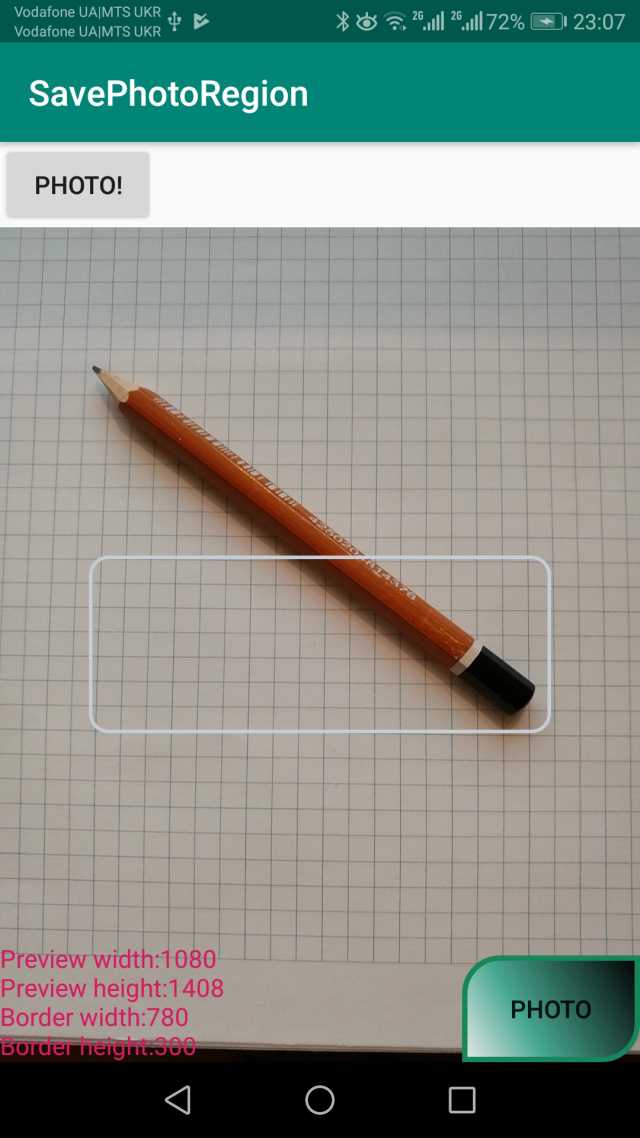
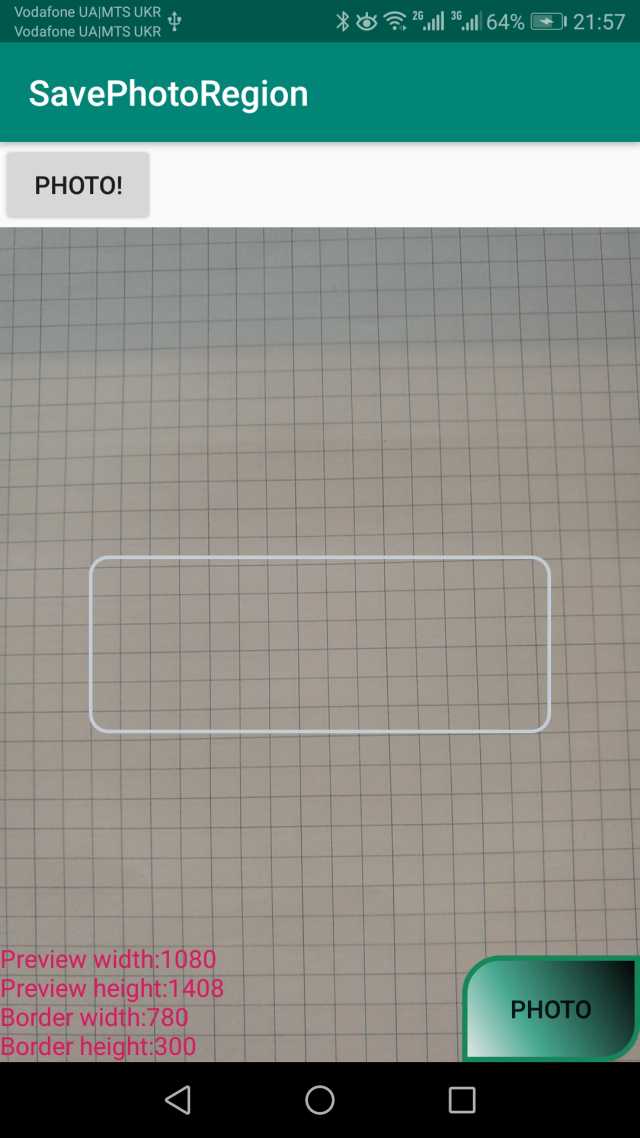
//write some info
int x1 = previewLayout.getWidth();
int y1 = previewLayout.getHeight();
int x2 = borderCamera.getWidth();
int y2 = borderCamera.getHeight();
String info = "Preview width:" + String.valueOf(x1) + "\n" +
"Preview height:" + String.valueOf(y1) + "\n" +
"Border width:" + String.valueOf(x2) +
"\n" + "Border height:" + String.valueOf(y2);
resBorderSizeTV.setText(info);
camera.setPreviewDisplay(surfaceHolder);
camera.startPreview();
previewing = true;
} catch (IOException e) {
e.printStackTrace();
}
}
}
@Override
public void surfaceDestroyed(SurfaceHolder holder) {
camera.stopPreview();
camera.release();
camera = null;
previewing = false;
}
设置正确的相机预览尺寸非常重要,如果图像的纵横比不适合预览相机尺寸 - 裁剪的图像尺寸不正确。
public Camera.Size getOptimalPreviewSize(List<Camera.Size> sizes, int w, int h) {
    final double ASPECT_TOLERANCE = 0.1;
    double targetRatio = (double) w / h;
    if (sizes == null) return null;

    Camera.Size optimalSize = null;
    double minDiff = Double.MAX_VALUE;

    int targetHeight = h;

    // Try to find an size match aspect ratio and size
    for (Camera.Size size : sizes) {
        double ratio = (double) size.width / size.height;
        if (Math.abs(ratio - targetRatio) > ASPECT_TOLERANCE) continue;
        if (Math.abs(size.height - targetHeight) < minDiff) {
            optimalSize = size;
            minDiff = Math.abs(size.height - targetHeight);
        }
    }

    // Cannot find the one match the aspect ratio, ignore the requirement
    if (optimalSize == null) {
        minDiff = Double.MAX_VALUE;
        for (Camera.Size size : sizes) {
            if (Math.abs(size.height - targetHeight) < minDiff) {
                optimalSize = size;
                minDiff = Math.abs(size.height - targetHeight);
            }
        }
    }
    return optimalSize;
}
定义一些功能来拍照:
@OnClick(R.id.make_photo_button)
void makePhoto() {
    if (camera != null) {
        camera.takePicture(myShutterCallback,
                myPictureCallback_RAW, myPictureCallback_JPG);
    }
}
和一些回调:
Camera.ShutterCallback myShutterCallback = new Camera.ShutterCallback() {
    @Override
    public void onShutter() {

    }
};

//leave it empty
Camera.PictureCallback myPictureCallback_RAW = new Camera.PictureCallback() {
    @Override
    public void onPictureTaken(byte[] data, Camera camera) {

    }
};

//we need only JPG
Camera.PictureCallback myPictureCallback_JPG = new Camera.PictureCallback() {
    @Override
    public void onPictureTaken(byte[] data, Camera camera) {
        Bitmap bitmapPicture
                = BitmapFactory.decodeByteArray(data, 0, data.length);

        Bitmap croppedBitmap = null;

        Display display = ((WindowManager) context.getSystemService
                              (Context.WINDOW_SERVICE)).getDefaultDisplay();
        if (display.getRotation() == Surface.ROTATION_0) {

            //rotate bitmap, because camera sensor usually in landscape mode
            Matrix matrix = new Matrix();
            matrix.postRotate(90);
            Bitmap rotatedBitmap = Bitmap.createBitmap(bitmapPicture, 0, 0,
                       bitmapPicture.getWidth(), bitmapPicture.getHeight(), matrix, true);
            //save file
            createImageFile(rotatedBitmap);

            //calculate aspect ratio
            float koefX = (float) rotatedBitmap.getWidth() / (float) previewLayout.getWidth();
            float koefY = (float) rotatedBitmap.getHeight() / previewLayout.getHeight();

            //get viewfinder border size and position on the screen
            int x1 = borderCamera.getLeft();
            int y1 = borderCamera.getTop();

            int x2 = borderCamera.getWidth();
            int y2 = borderCamera.getHeight();

            //calculate position and size for cropping
            int cropStartX = Math.round(x1 * koefX);
            int cropStartY = Math.round(y1 * koefY);

            int cropWidthX = Math.round(x2 * koefX);
            int cropHeightY = Math.round(y2 * koefY);

            //check limits and make crop
            if (cropStartX + cropWidthX <= rotatedBitmap.getWidth() &&
                         cropStartY + cropHeightY <= rotatedBitmap.getHeight()) {
                croppedBitmap = Bitmap.createBitmap(rotatedBitmap, cropStartX,
                                                    cropStartY, cropWidthX, cropHeightY);
            } else {
                croppedBitmap = null;
            }

            //save result
            if (croppedBitmap != null) {
                createImageFile(croppedBitmap);
            }

        } else if (display.getRotation() == Surface.ROTATION_270) {
            // for Landscape mode
        }

        //pass to another fragment
        if (mListener != null) {
            if (croppedBitmap != null)
                mListener.onFragmentInteraction(croppedBitmap);
        }

        if (camera != null) {
            camera.startPreview();
        }
    }
};
裁剪裁剪图像很简单:
//calculate aspect ratio
float koefX = (float) rotatedBitmap.getWidth() / (float) previewLayout.getWidth();
float koefY = (float) rotatedBitmap.getHeight() / (float)previewLayout.getHeight();

//get viewfinder border size and position on the screen
int x1 = borderCamera.getLeft();
int y1 = borderCamera.getTop();

int x2 = borderCamera.getWidth();
int y2 = borderCamera.getHeight();

//calculate position and size for cropping
int cropStartX = Math.round(x1 * koefX);
int cropStartY = Math.round(y1 * koefY);

int cropWidthX = Math.round(x2 * koefX);
int cropHeightY = Math.round(y2 * koefY);

//check limits and make crop
if (cropStartX + cropWidthX <= rotatedBitmap.getWidth() && cropStartY +
                                 cropHeightY <= rotatedBitmap.getHeight()) {
    croppedBitmap = Bitmap.createBitmap
                (rotatedBitmap, cropStartX, cropStartY, cropWidthX, cropHeightY);
} else {
    croppedBitmap = null;
}
另外,我们需要写位图来存档:
public void createImageFile(final Bitmap bitmap) {

    File path = Environment.getExternalStoragePublicDirectory(
            Environment.DIRECTORY_PICTURES);

    String timeStamp = new SimpleDateFormat("MMdd_HHmmssSSS").format(new Date());
    String imageFileName = "region_" + timeStamp + ".jpg";
    final File file = new File(path, imageFileName);

    try {
        // Make sure the Pictures directory exists.
        if (path.mkdirs()) {
            Toast.makeText(context, "Not exist :" + path.getName(), Toast.LENGTH_SHORT).show();
        }

        OutputStream os = new FileOutputStream(file);

        bitmap.compress(Bitmap.CompressFormat.JPEG, 100, os);

        os.flush();
        os.close();
        Log.i("ExternalStorage", "Writed " + path + file.getName());
        // Tell the media scanner about the new file so that it is
        // immediately available to the user.
        MediaScannerConnection.scanFile(context,
                new String[]{file.toString()}, null,
                new MediaScannerConnection.OnScanCompletedListener() {
                    public void onScanCompleted(String path, Uri uri) {
                        Log.i("ExternalStorage", "Scanned " + path + ":");
                        Log.i("ExternalStorage", "-> uri=" + uri);
                    }
                });
        Toast.makeText(context, file.getName(), Toast.LENGTH_SHORT).show();

    } catch (Exception e) {
        // Unable to create file, likely because external storage is
        // not currently mounted.
        Log.w("ExternalStorage", "Error writing " + file, e);
    }
}
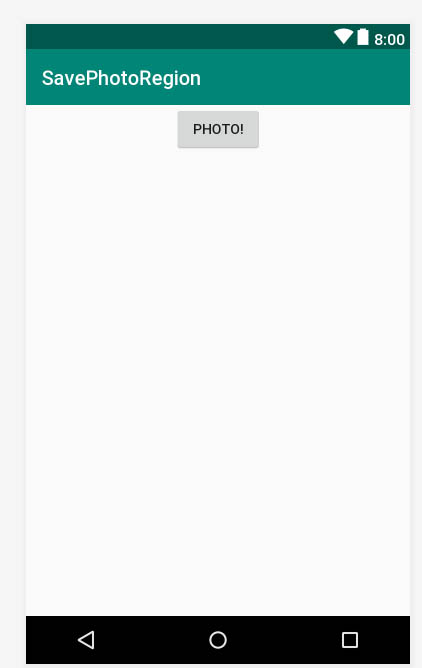
设计MainActivity类:
<?xml version="1.0" encoding="utf-8"?>
<FrameLayout xmlns:android="http://schemas.android.com/apk/res/android"

    xmlns:app="http://schemas.android.com/apk/res-auto"

    xmlns:tools="http://schemas.android.com/tools"

    android:layout_width="match_parent"

    android:layout_height="match_parent"

    tools:context=".MainActivity">

    <LinearLayout

        android:layout_width="match_parent"

        android:layout_height="match_parent"

        android:orientation="vertical">

        <LinearLayout

            android:layout_width="match_parent"

            android:layout_height="wrap_content"

            android:orientation="vertical">

            <Button

                android:id="@+id/make_photo_button"

                android:layout_gravity="center"

                android:layout_width="wrap_content"

                android:layout_height="wrap_content"

                android:text="Photo!" />
        </LinearLayout>

        <LinearLayout

            android:id="@+id/res_photo_layout"

            android:layout_width="match_parent"

            android:layout_height="wrap_content"

            android:orientation="vertical">

        </LinearLayout>
    </LinearLayout>
</FrameLayout>
并提出一些代码:
public class MainActivity extends AppCompatActivity
       implements PhotoFragment.OnFragmentInteractionListener {

    int PERMISSION_ALL = 1;
    boolean flagPermissions = false;

    String[] PERMISSIONS = {
            android.Manifest.permission.WRITE_EXTERNAL_STORAGE,
            android.Manifest.permission.CAMERA
    };

    @Override
    protected void onCreate(Bundle savedInstanceState) {
        super.onCreate(savedInstanceState);
        setContentView(R.layout.activity_main);
        ButterKnife.bind(this);
        checkPermissions();
    }

    @OnClick(R.id.make_photo_button)
    void onClickScanButton() {
        // check permissions
        if (!flagPermissions) {
            checkPermissions();
            return;
        }
        //start photo fragment
        getSupportFragmentManager()
                .beginTransaction()
                .replace(R.id.res_photo_layout, new PhotoFragment())
                .addToBackStack(null)
                .commit();
    }

    void checkPermissions() {
        if (!hasPermissions(this, PERMISSIONS)) {
            requestPermissions(PERMISSIONS,
                    PERMISSION_ALL);
            flagPermissions = false;
        }
        flagPermissions = true;
    }

    public static boolean hasPermissions(Context context, String... permissions) {
        if (context != null && permissions != null) {
            for (String permission : permissions) {
                if (ActivityCompat.checkSelfPermission(context, permission)
                        != PackageManager.PERMISSION_GRANTED) {
                    return false;
                }
            }
        }
        return true;
    }

    @Override
    public void onFragmentInteraction(Bitmap bitmap) {
        if (bitmap != null) {
            ImageFragment imageFragment = new ImageFragment();
            imageFragment.imageSetupFragment(bitmap);

            getSupportFragmentManager()
                    .beginTransaction()
                    .replace(R.id.res_photo_layout, imageFragment)
                    .addToBackStack(null)
                    .commit();
        }
    }
}
作物测试: